
O Circuit: Patagonia’s Scenic Route the Hard Way
- 2 ON EARTH

- Aug 3, 2025
- 26 min read
Updated: Dec 29, 2025

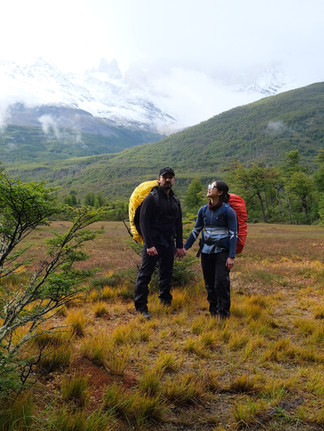
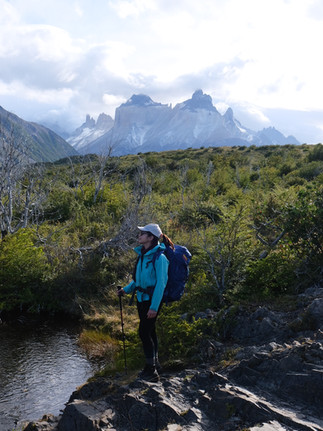
The O circuit had been on our bucket list for years. There’s something about hiking around in Patagonia, surrounded by glaciers, rivers, all while carrying your own backpacks, that kept calling to us.
Before we set off, we had so many questions. What’s the difference between the O circuit and the W trek? How many days should we plan for? Would we need to carry all our gear? And of course, what would the weather really be like out there?
In this mega blog, we’re sharing what we wish we had known before starting the trail along with all our tips and tricks. The O circuit is often described as the scenic route, and it is, but it’s also the long way around with some real challenges. Here's how we prepared, what surprised us, and why it was totally worth it!
Type 2 fun: experiences that are challenging, uncomfortable, or even miserable in the moment but become enjoyable or deeply rewarding in hindsight. It's the kind of fun you might not appreciate in the moment but you look back on it with pride and even may consider to do it again.
Good to know:
Official language: Spanish (people working in hospitality will speak English in Santiago, Puerto Natales and on the O circuit)
Currency: Chilean Peso (CLP)
Foreign credit cards acceptance: (foreign) credit cards are accepted in hotels and most restaurants. Even on the O circuit, we noticed that card payment was possible. We would recommend carrying some cash on you, especially if you're planning to do the O circuit or W trek. There is a bus that will take you from the entrance to the national park to the visitor centre and they only accept cash.
Population: Chile has a population of 19.8 million, 90% of the population lives in cities and bigger towns and about 7 million people live in Santiago (the capital). It's estimated that just under 500,000 people live in Chilean Patagonia.
Best season: November - March (peak period: December - February). This is because it is Patagonian summer but make no mistake in thinking the weather is mild. The Patagonian winds are infamous!
Safety concerns: In Patagonia we had none, the O circuit and W trek are tourist friendly and the amount of visitors is regulated. In bigger cities, always exercise caution with your belongings.
Tipping culture: It has become pretty standard for restaurants to add 10% service charge to the bill. It's called "propina" and usually they will ask you if you'd like to add it when you pay.
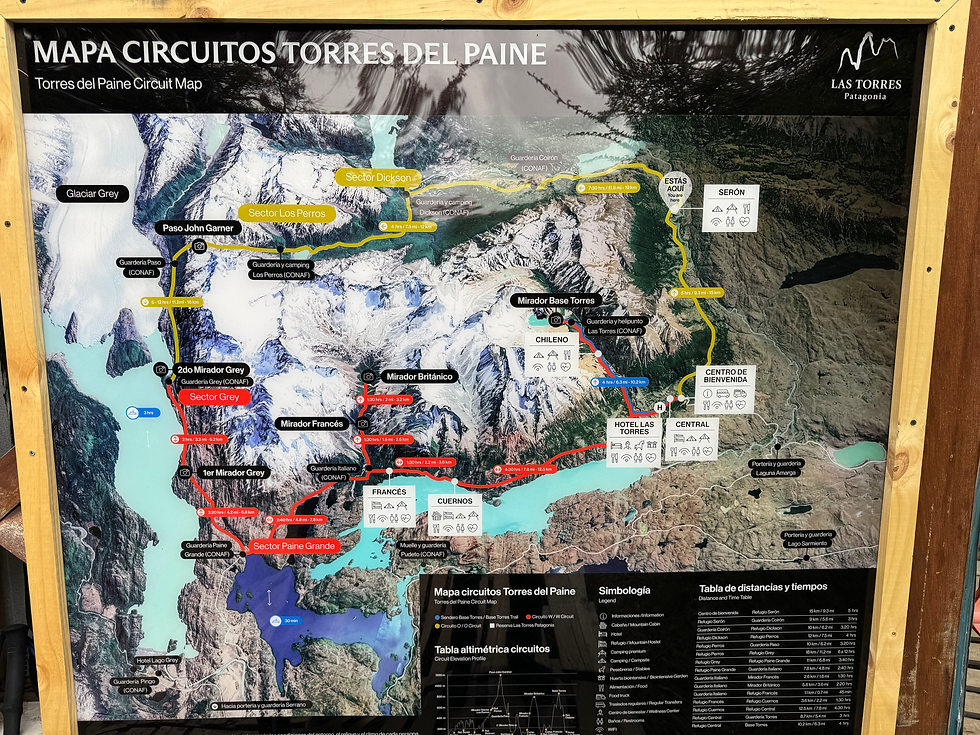
Download AllTrails and save the O circuit. There weren't a lot of signs on the O circuit so if you want to know that you're heading the right direction and how many kilometres are still left it's handy to follow it on your phone.
Every campsite provides free potable water (tap water) and most campsites will also provide hot water for free. We never found that we ran out of water between two campsites.
There is no need to start your day super early on the O circuit and W trek as campsites will typically allow you to check in from 13:00. Take note of the check out times as those are usually around 9:30.
Paid WiFi vouchers were available at each campsite location except Los Perros. Mobile signal throughout Torres del Paine National Park is extremely limited, so don’t expect much (if any) connectivity. It’s a great opportunity to unplug and enjoy being offline.
O circuit or W trek?
The O circuit is a full loop around the park. It includes the W section, so you get the complete experience. It covers about 136 kilometers (85 miles) and usually takes between 7 and 9 days to complete. The W trek is shorter and more frequently chosen. It focuses on one side of the park and covers around 80 kilometers (50 miles) over 4 to 5 days.
Both are self-supported treks, which means you'll need to carry your own gear and food unless you’re staying in the refugios and/or buying meals there. Wild camping is not allowed anywhere in the park, so even if you're carrying a tent, you must book your campsites or accommodations in advance for every night of your trek.
Below is a side-by-side comparison to help decide which route might be right for you:
O circuit | W trek | |
Duration | 7-9 days | 4-5 days |
Distance | 136km (85 miles) | 80km (50 miles) |
Difficulty | Hard | Moderate |
Accommodation | Camping & refugios (one location is camping only and is a mandatory stop) | Camping & refugios |
Facilities | Hot showers, cold showers (at least at one place), flush toilets, plugs for charging, food shop and sheltered kitchen area. | Hot showers, flush toilets, plugs for charging, food shop and sheltered kitchen area. |
Highlights | Dickson lake, John Garner Pass, Grey Glacier and the 3 suspension bridges between John Garner Pass and Camp Grey | Mirador Francés & Británico, French Valley, Torres del Paine viewpoint |
Suitable for? | Intermediate & advanced hikers, can carry own gear and is comfortable hiking 18-20km per day | Beginners, families, casual hikers |
How to book it?
To make things wonderfully simple (not really), two separate companies operate the campsites and refugios in Torres del Paine National Park. Vertice manages the sites at Dickson, Los Perros, Grey, and Paine Grande. Las Torres operates Torres Central & Norte, Chileno, Cuernos, Francés, and Serón.
These sites aren’t split into one side of the national park and the other side nor do they follow each other consecutively. You’ll need to use two different booking websites (one for Vertice and one for Las Torres) and manually align your dates to make sure you have accommodation booked for every night. That means you first need to decide on your trekking dates and the number of days you want to spend on the trail. Once you start looking, you’ll be able to see what’s available, then you’ll have to piece it all together to make sure the full itinerary works.
We decided to go with a third-party booking service Torres Hike, which charged us a fee (160 USD), but honestly, it saved us a lot of time and we were less likely to make mistakes. They show you available options based on your chosen route and number of days, and then take care of all the reservations for you.
When booking, you’ll need to choose your type of accommodation in advance: either a campsite or a room in a refugio. If you’re going with the campsite and plan to rent a tent, we highly recommend booking the tent at the same time. Sleeping bags and mats can usually be rented on the day of check-in, as they tend to have plenty available. However, if you already know you’ll need them, it’s a good idea to reserve in advance.
Premium campsites (210 USD per night) come with rooftop tents set up on elevated frames, accessed by a ladder. They’re surprisingly spacious and the floor has a built-in sleeping mat for added comfort. These are more expensive than standard campsites, but at several sites operated by Las Torres, they were the only ones available when we booked.
Regular campsites (44 USD per night) provide good-quality two-person tents, but they’re definitely more compact compared to the premium setup. At Vertice campsites they didn't have the premium tent option.
Other options would be:
Bunk bed in shared dormitory (from 43 - 207 USD per person per night)
Mountain cabin (640 USD for 2 people per night)
We did the O circuit in 7 days (6 nights). It was definitely challenging! One of our days was 28 kilometres, and on average we hiked around 20 kilometres each day. If we were to do it again, we might consider adding an extra day to spread out the distances a bit more. It would have made for a slightly more relaxed experience. If you opt for an extra day on the O circuit, we would recommend staying an extra day at Grey so you can book yourself a day trip activity e.g. kayaking, glacier hiking.
Which campsites should you choose?
If you're planning to hike the O circuit in Torres del Paine, be prepared for some flexibility. Almost everyone we met along the trail said they didn’t get the exact campsites they had hoped for when booking. So, don’t stress too much about crafting the perfect itinerary.
These were the campsites we booked:
Day 1: Serón
Day 2: Dickson
Day 3: Los Perros
Day 4: Grey
Day 5: Cuernos
Day 6: Torres Central & Norte
If we could’ve changed anything, we would have swapped Torres Central & Norte for Chileno. Staying at Chileno gives you the chance to catch the sunrise at the iconic Torres del Paine viewpoint, which is beautiful if the weather is good and the peaks aren't covered by clouds.
That said, sunrise is also one of the busiest times at the lookout, along with the midday wave when buses of day trippers start arriving. We found the quietest moment to be around 9:00 am because the sunrise groups are already on their way back, and the crowds haven’t arrived yet.
We also met hikers who visited the Torres on their first day and then ended their trek at Cuernos. While that’s an option, we would recommend starting with Serón and saving the Torres for the finale. It really is one of the highlights of the park and makes for a memorable finish!
What should I pack for the O circuit?
55-65L backpack
A lightweight packable/foldable backpack (there will be portions of the trek where you will leave your big backpack and continue hiking. You will want to have a light backpack to carry your essentials e.g. water, rain jacket, snacks)
Merino wool buff (tubular scarf)
Lightweight and quick dry sports tops
Leggings/trousers
Warm layers to sleep in (some locations like Los Perros are damp and cold)
Down jacket
Rain jacket + wind breaker
Rain pants
Hiking socks
Hiking boots
Hiking poles (you need these)
Headlamp
Flashlight or extra light for in the tent
Mosquito spray
Quick dry travel towel
Toiletry bag + toiletries (with a hook is even better)
Slippers (trust us, you'll want to take off your shoes at the end of the day)
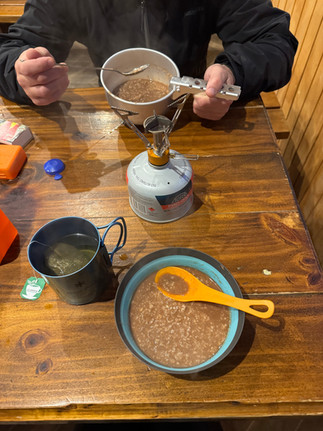
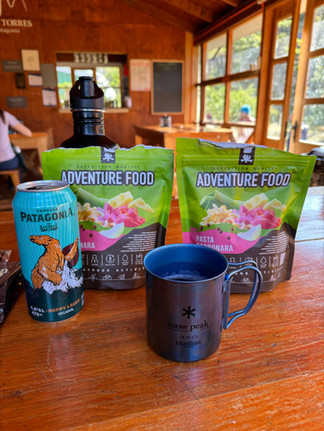
Dehydrated meals (for at least the Los Perros campsite)
Instant oats (super easy to prepare, and you only need hot water which most campsites provide and otherwise you boil your own water)
Trail mix
Protein bars
Water bottle (0,8 - 1L)
Baby wipes
Hand sanitizer
Compact gas stove (8.1oz or 230g was enough for 1 week)
Matches
Gas canister (buy in Puerto Natales or wherever you're based from once in Chile)
Camping mug (titanium)
Camping pan (by Trangia) + pan holder
Foldable bowl
Camping cutlery
Small bottle of dishwashing soap
Sponge
Deck of cards or a book
Sleeping bag (unless you decide to rent it at the campsite or stay in a refugio)
Sleeping mat (unless you decide to rent it at the campsite or stay in a refugio)
Plastic bags of various for waste you may need to carry along the way, or anything you want to keep clean or dry
Earplugs
Eye mask
We did not need:
Swimwear (no swimming is allowed in lakes, lagoons or rivers in the Torres del Paine National Park)
Water purification tablets
Should we pre-book meals on the O&W circuit?
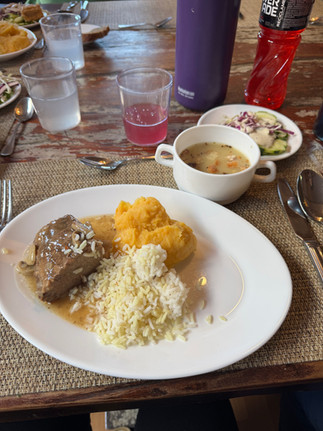
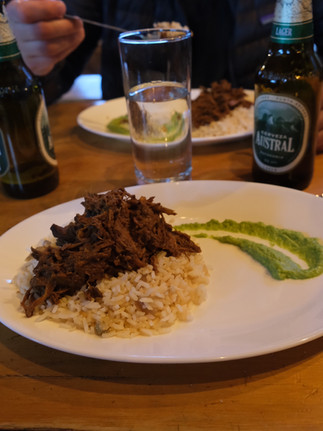
Meals on the O circuit and W trek are pretty average and cost on average 30 USD for breakfast, 40 USD for packed lunch and 50 USD for dinner per person. We booked dinner for 3 days and it was only worth it because of not having to carry so many dehydrated meals ourselves and for a bit of variation. Honestly, the "a la carte"lunches we had in the refugios were nicer than the dinner they serve. Breakfast is a complete ripoff, some places only served cereals and coffee. The packed lunch was meagre and expensive for what you get (usually a dry sandwich and fruit). We recommend pre-booking meals if you're travelling light and if convenience > cost for you.
Our typical day
Breakfast: Instant oats
During the trek: Nuts, protein bars, chocolate
Lunch: At the campsite we shared 1 pizza or 1 hamburger. At Los Perros we had instant cup noodles.
Dinner: Dehydrated meal, tea or a pre-booked meal


Getting to Torres del Paine National Park (and back)
If you're staying in Puerto Natales, the easiest way to reach Torres del Paine is by bus. We went with Bus Sur (booked via Recorrido), which has it's first departures of the day at 6:45 and 7:00 AM (33 USD for a return trip per person). The journey takes about 2 hours and drops you off at Laguna Amarga, one of the main park entrances.
From Laguna Amarga, it's still another 7 km to the visitor centre, where typically the O circuit and W trek begin. To cover this stretch, we recommend saving your legs and taking the park shuttle bus (4,500 CLP per person, cash only).
We recommend planning your return bus in advance. When we booked the 20:00 bus back to Puerto Natales, it was more of a wild guess. We weren’t sure how long the hike would take or how tired we’d be afterwards, so we picked a later time to be on the safe side. Even the day before the hike, we were still debating whether to switch to the 15:00 bus, and only made the change once we got back to the visitor centre after our trek to the base of the Torres del Paine. Note, that if you do this you'll have to buy new tickets as changes are only free of charge up to 48 hours before departure. We did get a partial refund but another thing to keep in mind is that the bus could also be full and you may not be able to book yourself onto the earlier bus.
The real issue wasn’t making the 15:00 departure itself, but the fact that you need to be at the visitor centre by 14:00 to catch the park shuttle. Otherwise, you're faced with a 7 km walk back to Laguna Amarga.

If you're going for the earlier return, be sure to leave the base of the Torres del Paine by 9:15 AM. The descent typically takes around 2.5 hours, depending on your pace.
Is it worth going?
It took us more than 24 hours to get to Torres del Paine National Park, so if this is going to be the same for you we can imagine that it's quite a time and cost commitment "just to go to the mountains".
What we liked:
Stunning and diverse scenery with plenty of glacier views along the way
Well organised, clean and relatively well marked trails
Good campsite facilities with (hot) running water, flush toilets and power outlets
Not overrun with group tours, so most of the time we felt like we had the trails to ourselves (with the exception of Torres del Paine)
Considerations:
If you're a big backcountry camper/hiker this will not feel that rugged. This will feel pretty luxury.
You have some flexibility with hiking pace and start times, but campsite check-outs, trail entry time rules (like John Garner Pass Mirador Francés, Mirador Británico and the Torres base), and meal schedules mean you can’t just wing it or decide to go back to a location for sunset.
If you enjoy hiking with others, plan the O circuit with people you know. Campsites align early on, but after Grey the groups spread out and you might not see the same faces again.
For us, it was completely worth it. This trek is actually what inspired us to start planning our next multi-day adventure. If you have any tips or trail recommendations, we’d love to hear them in the comments!
Daytrip to Torres del Paine?
Don't have the time or energy to do the full O or W trek but you have FOMO? A day trip to Torres del Paine might just be the thing for you. See the trail closure times below and time your hike accordingly. Aim to start no later than 12:00.
Refugio Chileno 14:00
Guardería Torres 15:00
Mirador base Torres 16:00
Day 1: Visitor centre - Serón
19km (↑357m, ↓285m)
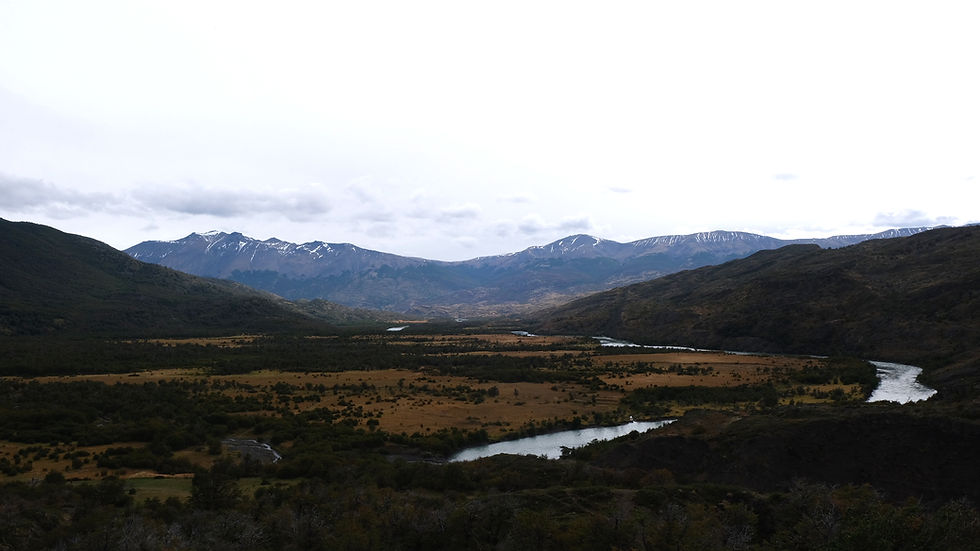
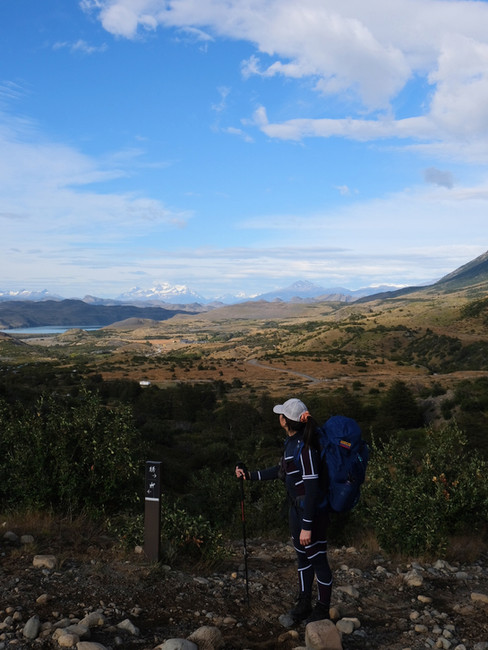
We took the bus at 6:45 from Puerto Natales and by the time we arrived at the visitor centre it was buzzing. Everyone was excited to get started. The visitor centre has good facilities so if you need a bathroom break or want to buy food or souvenirs, you're in the right place. The trek starts just behind it. The scenery is beautiful and when you arrive to Serón you'll see open meadows and mountains in the surrounding area.
Check-in: Inside the main building with the picnic tables outside. It's where food is served as well.
Food: Lunch on the spot was possible between 14:00-18:00 and note that you'll need to order at the reception so to avoid queueing twice you can place your order straight away when checking in. Small selection of snacks available to buy.
Bathrooms: Two bathrooms and toilets per gender
Charging electronics: Plenty of outlets in the main building
Trash service: Yes
Camping kitchen: A really basic tent, it was one of the worst kitchen facilities on the trek.


Day 2: Seron - Dickson
18km (↑304m, ↓266m)

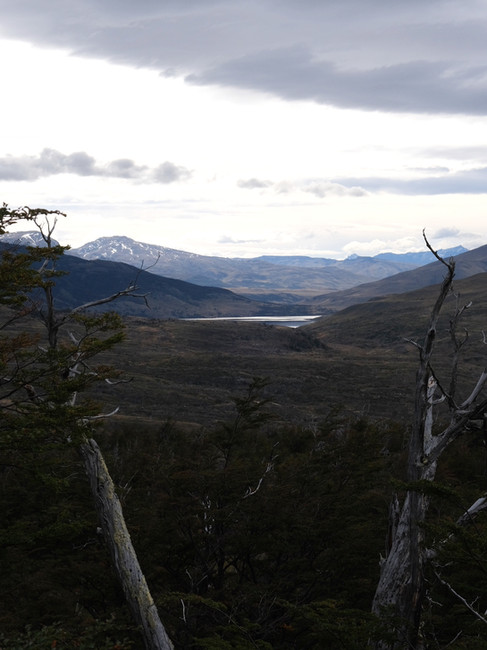
We hit the trail at 8:00, which meant an early start. We woke up around 6:00 to freshen up, make breakfast, and pack our gear. The first notable stop along the route is Guardería Coirón, a ranger station where you’ll usually find a basic toilet. A bit further along, there’s a scenic creek that makes for the perfect rest stop. Dip your hands in the cool water to refresh yourself. From there, continue on toward Dickson, taking in the stunning views of Lake Dickson along the way. Once you arrive to Dickson, check-in, drop your bags, and follow the signs to the lake to admire the view and dip your feet in.
Check-in: You’ll come across a ranger station where hikers are asked to sign in on a sheet of paper. We noticed these stations all along the O circuit, likely used to track how many people are on the trail. After signing in, head to the main building with the covered deck. At reception, the staff will give you a quick overview of the next day’s hike toward Los Perros.
Food: Lunch on the spot was possible, with options like hamburgers and pizza. At the reception area, there is also a well-stocked convenience store that offers a wide selection, including gas canisters for camping stoves. It's a good opportunity to restock, since the next stop (Los Perros) is much more remote. Although some food is available there, the choices are limited and prices are higher.
Bathrooms: Two bathrooms and toilets per gender
Charging electronics: There are outlets in the Refugio restaurant and at reception. There are 3 power outlets in the camping kitchen room.
Trash service: Yes
Camping kitchen: Yes, there is a proper building for it right by the camping reception. If you want hot water you need to get it at the restaurant. Opening times: 7:00 - 10:00, 13:00 - 22:30.
Note: there is a loud generator that is on until 22:00/23:00 in the evening and it gets turned on again around 6:30. The tents are located pretty close together, so you will hear other people around you.


Day 3: Dickson - Los Perros
11km (↑408m, ↓63m)

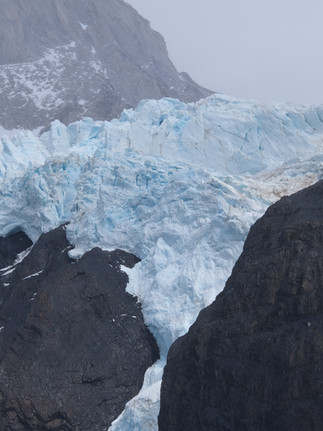
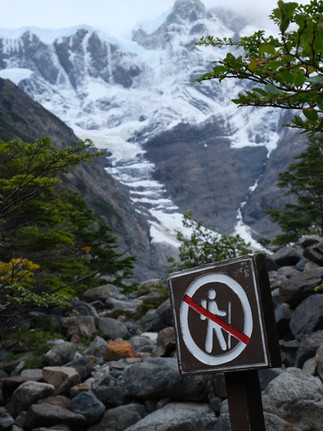
Get ready for a muddier day of hiking, with sections that lead through forest trails and across small wooden bridges. This is where the scenery on the O circuit starts to change, and in our opinion, it becomes even more breathtaking. You’ll know you’re getting close to Los Perros when you begin a long scramble over loose pebbles that seem to go on forever. Not long after, you’ll be rewarded with an incredible view of the Los Perros Glacier.
Eventually, you’ll reach a sign pointing toward the Los Perros campsite. At this point, you can either leave your bags there and head straight to the glacier for a quick side trip, or continue to the campsite, check-in, and then walk back to the viewpoint.
When we arrived, the campsite was wet, muddy and quite buggy. If you're lucky, your tent will be set up on one of the slightly elevated wooden platforms. If not, be prepared for a cold, damp floor and the occasional tree root massaging your back. We imagine that in the coming years, all rental tents will be placed on raised platforms.
Since it was cold and damp, we didn’t feel like hanging around the site. We hiked back to the glacier and ended up having the whole place to ourselves. Hikers tend to arrive at different times, so it's quite likely you'll be able to enjoy places like these in peace and quiet.
Check-in: You’ll come across a ranger station where hikers are asked to sign in on a sheet of paper, the ranger will let you know that you have to leave Los Perros by 7am. At the reception they will repeat the check-out time and explain what facilities they have and the opening times.
Check-out: 7:00 as established by CONAF (Corporación Nacional Forestal) due to the complexity of the next section of the circuit to Grey.
Food: There is a basic snack selection at reception. Pre-booked food dinner will be: a dehydrated meal, instant soup, bread and juice. If you have packed lunch for Los Perros, this will be picked up at Dickson which means you'll carry two lunch boxes with you. A basic breakfast is possible to pre-book but we left before seeing what was served.
Bathrooms: One bathroom and 2 toilets per gender. Only cold water!
Charging electronics: Multiple outlets in the camping kitchen.
Trash service: None, you are asked to take your trash with you.
Camping kitchen: Yes, there is a proper building for it right by the camping reception. It opens already at 5:00am. It gets busy for dinner and breakfast because there is only one area for all hikers. It does make for a cozy atmosphere because everyone gathers together whereas at other campsites people are more spread out. We noticed that people had left/donated gas canisters so if you run out, chances are you can borrow one from the "donation box".
Side quest: Hike to lake and glacier Los Perros, as mentioned above.


Day 4: Los Perros - Grey
14km (↑681m, ↓1133m)

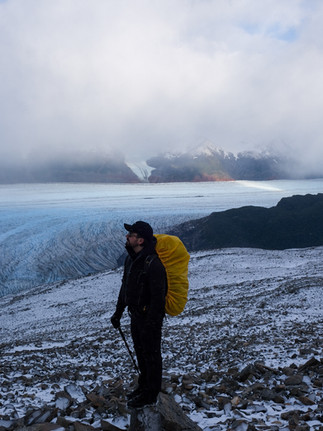
After hearing for days that this would be the most difficult part of the trek due to the John Garner Pass (the highest point of the trek), we felt the kind of excitement you usually get before a mountain summit day. The recommendation is to allow 6-12 hours to get to camp Grey. Around 6:15, we packed up and happily waved goodbye to our damp tent for good, hitting the dark forest trail with our headlamps on. The path was muddy and wet, surrounded by trees that made navigation tricky at times. The trail is marked with orange paint and bits of string or plastic tied to branches, which helped guide the way.
Eventually, you start walking along a ridge that’s completely exposed. Wind, rain, and snow came at us from every direction, but it only added to the sense of adventure. We moved between stretches of forest and open ridge until we eventually made the final push toward the pass fuelled by M&Ms. When we finally reached it, the wind had picked up and the snow hit our faces like shards of glass. We had to pull up our buffs and put on sunglasses to protect our skin and eyes.
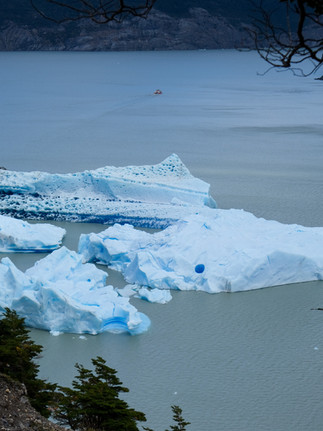
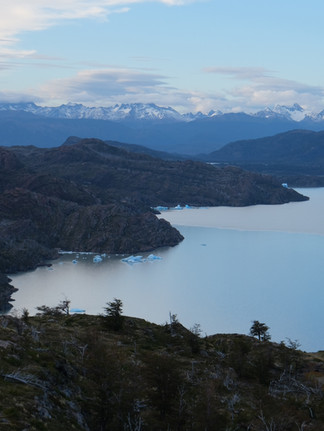
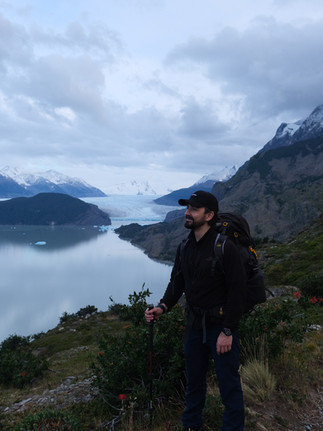
Then came the highlight of the day, and honestly, of the entire O circuit: the Grey Glacier. This incredible sea of ice stretches across approximately 270 square kilometres. The view was absolutely breathtaking. The trail follows the glacier, with spectacular views to your right nearly the whole way to camp Grey.

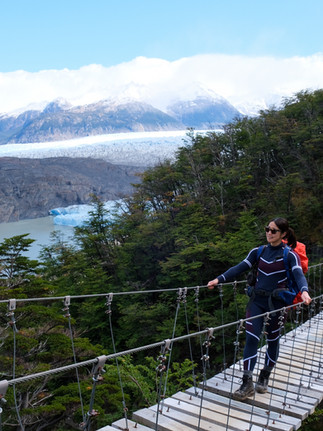
Another major highlight of the day is crossing three suspension bridges. These are the first of several, but in our opinion, the ones on the O circuit are the most photogenic! Especially with the glacier as your backdrop. If you’re hoping to capture that Insta-worthy shot, this is the place to do it.
Just past the John Garner Pass, you’ll find Camp Paso, a small ranger station with running water and a toilet. It's a great spot to rest, have lunch, and regroup before hiking the remaining 8 km to Camp Grey. If you don't necessarily want to make hot food, there is a great place to have a break 5 mins before Camp Paso where you have a little waterfall and can enjoy the view.
They say it will take you from 6-12 hours to hike from Los Perros to Grey and it took us around 9 hours with proper stops for taking pictures and a food stop.

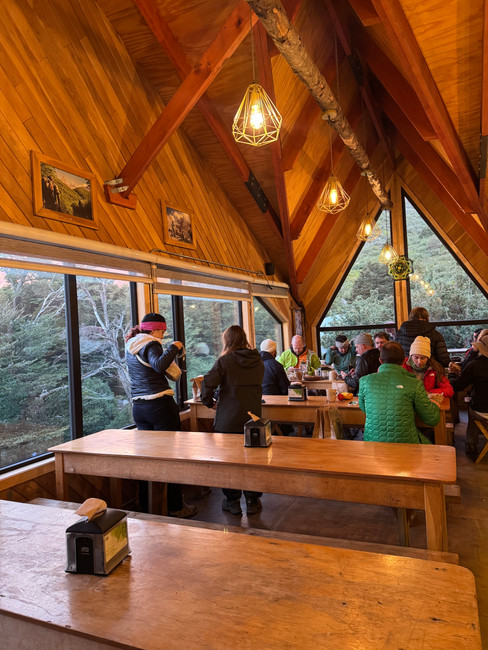
Camp Grey had some of the nicest facilities we came across on the trail and it ended up being our favourite stop. The refugio had a spacious deck where you could sit outside, enjoy a cold drink, and treat yourself to a well-earned pizza to celebrate both the John Garner Pass crossing and reaching the halfway point of the circuit. The showers were proper hot, and for the first time, there were more than just two stalls, which felt like a real upgrade. The campsite itself was peaceful and surrounded by beautiful mountain scenery.
From this point onward, the O circuit merges with the more popular W Trek, and the trail becomes noticeably busier. The group you’ve likely been hiking with may begin to spread out, as some hikers take rest days and others choose different campsites. On the W section, the camps are located closer together, so people tend to go at their own pace and follow different schedules.


Check-in: It will be the first building you arrive at from the direction of the pass/glacier. There is a check-in window.
Food: Lunch upon arrival is possible. They offered pizza and 2 beers for 25,000 CLP (22 EUR) which was amazing after a long day. They had a well-stocked convenience store which sold gas canisters.
Bathrooms: Toilets are located in the same building as the check-in and showers are the building next door (between the check-in and refugio building). 4 showers per gender. The showers get proper hot water!
Charging electronics: Yes, there are outlets right by the check-in window or by the reception in the refugio building.
Trash service: Yes
Camping kitchen: Yes, located in the same building as the check-in. Hot water is provided in the refugio dining room and is free. The camping kitchen doesn't open until 7:00am so if you have an early start like we did (we had a 28km day ahead of us) you'll have to make your food outside on the picnic tables.
Side quest: Book a kayak or glacier hike (has to be done in advance and you'll need to stay an extra day here)
Note: If you're on the W trek, hoping to get to the John Garner Pass this is not allowed. The pass is only accessible anti-clockwise on the circuit which means you will only be able to reach it during the O circuit. If you're staying an extra day in Grey, you could do a day trip to the 3 suspension bridges.


Day 5: Grey - Mirador Frances - Cuernos
21km (↑546m, ↓367m) and 7km (↑81m, ↓496m)

If carrying your own backpack through a mountain pass wasn't tough enough, imagine following it up with a 28km hiking day. We got off to an early start around 6:00 AM, knowing we had a long day ahead. The plan was to pass by Paine Grande and the Francés Valley before reaching our campsite for the night, Cuernos.


If you’re staying at Paine Grande, the location is beautiful. The refugio overlooks the lake, the facilities are clean, and there’s a well-stocked convenience store where we picked up a bag of delicious vegetable crisps to fuel us for the day. From there, the trail follows Lago Skottsberg which was absolutely stunning.
Time management was key, especially if you want to reach the viewpoints at Mirador Francés and Mirador Británico. To be allowed up, you need to aim to reach Guardería Italiano by around 13:00. A sign at the station advises hikers not to continue past 14:00 (someone from CONAF does check the trail). When you arrive, there’s plenty of space to drop your big backpacks and repack with only the essentials.
We chose to hike up to Mirador Francés since we had booked dinner at Cuernos and didn’t want to miss it. The climb to the viewpoint is fairly steep, but once you reach the top, you're rewarded with a well-earned break and a stunning view. If you stick around a while, you might hear and even see chunks of glacier breaking off in the distance.
The final stretch back to Cuernos felt long and exhausting, especially when it started drizzling towards the end for dramatic effect. You’ll know you’re nearly there when you spot the pebble beach. A welcome sight after a demanding but unforgettable day! The feeling of taking off our boots and putting on our slippers never felt better.
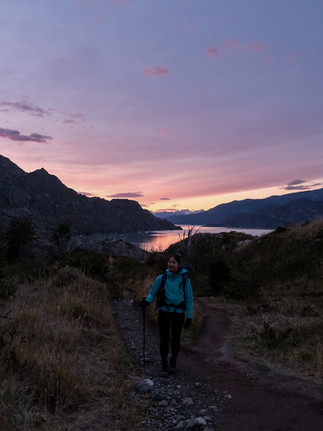
Cuernos campsite is located in a forested area close to the lake. We liked the way this campsite looked a lot more than Francés and heard from others that the showers facilities weren't as good over there. Tip: sunrise and sunset at Los Cuernos were some of the most colourful we've seen in Patagonia.

Check-in: Keep walking past all the "premium" tents until you see the refugio building. The camping reception is a bit further up, not the main entrance for the refugio but more in the same area as the camping kitchen.
Food: We arrived around dinner time but it did look like lunch upon arrival was possible. They have a proper dining area and a bar. Both the camping and refugio receptions sold snacks but there were limited options.


Bathrooms: They're located a bit far from the rented tent area but they have 24/7 hot showers and 4 shower stalls and toilet stalls per gender. Also not unimportant, 2 mirrors and sinks so you can properly get ready in the mornings and evenings.
Charging electronics: Yes, there are power outlets by the refugio reception and camping kitchen.
Trash service: Yes
Camping kitchen: Yes, located in the same building as the camping check-in. Hot water is provided in the kitchen and is free. The camping kitchen doesn't open until 7:00am.


Day 6: Cuernos - Torres Central & Norte
12km (↑314m, ↓254m)

This was the day we officially crossed the 100km mark on the trail. We were nearing the end of the O circuit, with just one more day ahead of us before reaching the iconic Torres del Paine!
One of the highlights of the day was stumbling upon a side trail that led to an incredible, secluded viewpoint of the Cuernos del Paine. It ended up being one of our favourite "hidden" spots. We keep a few of these special places aside for friends, family, so feel free to reach out if you're interested in a curated itinerary via work with us section on our website.
If you're continuing on to Chileno, we recommend starting early. That section is mostly uphill and can be quite demanding. However, if you’re heading to Central & Norte, the hike is much more manageable and is a relatively easy day. When you arrive, the bathrooms are accessible and there’s a place to store your bags if you want to relax, grab a bite at the refugio or at the visitor centre (where you start on day 1).
Check-in: Camping reception is located at the kiosk across from the small bridges across from, the refugio building. It opens at 14:30 but you can shower in the meantime and leave your bags. The refugio has lots of power outlets and relax areas. It's a nice place to hangout.
Food: When we arrived, the kitchen in the refugio had closed. Food was available from 15:30 (pizza), alternatively the visitor centre sold empanadas, sandwiches and hotdogs. There is a well-stocked convenience store in the camping reception kiosk but it's slightly more expensive than the visitor centre (which is a 2 minute walk away).
Bathrooms: The bathrooms are close to the camping reception and there are lots of toilets and showers available per gender. It is unlikely you'll be queueing to use them.
Charging electronics: Yes, there are power outlets by the refugio reception and in the bathrooms.
Trash service: Yes
Camping kitchen: Cooking can be done everywhere on the wooden tables outside or in the partially covered white tents. Hot water is provided at the camping reception until 22:00 and is free. Dishes can be done near to the bathrooms, there are outdoor sinks with hot and cold water.
Luggage storage: Yes, 24/7 in a separate room close to the bathrooms.
Tip: When you have 6 days of hiking over the course of 100+km in your legs, you really want to pack efficiently (no extra weight) for your last epic day on the O circuit. If you have time to pass by the visitor centre to check the weather forecast, it is worth it especially if you're staying at Central & Norte because they show a pretty accurate hour by hour forecast on wind and rainfall. The camping reception does also often have this information. We had a beautiful day forecasted so we knew we wouldn't need any extra rain gear.


Day 6: Torres Central & Norte - Mirador Torres del Paine - Park Entrance
20km (↑961m, ↓957m)

The final push to the Torres
We started hiking in the dark, around 5:30 in the morning, aiming to reach the base of the Torres del Paine by 9:00. The air was crisp and the trail was quiet apart from the sound of our boots. At a steady pace, we reached Chileno campsite around 7:00, which made for a good spot to take a short break. The bathrooms at Chileno are for paying guests only, but no one was checking when we arrived. They also have water in case you need to refill your bottle.
From Chileno, the trail continues upward for another solid two hours. The final stretch involves a bit of scrambling over loose rocks, and it’s easy to get off track if you’re not careful. Try to keep an eye out for trail markers along the way, if you haven't seen one in a while chances are you've gone off track.
When we finally reached the base, we soaked in the moment. The sun was already up, so the sunrise crowds had cleared out. There were maybe 15 people in total, scattered across the wide open area. It was peaceful and felt almost private. The view was incredible, with clear skies giving us a perfect look at all three of the famous peaks: Norte, Central, and Sur. Not the most creative names, but standing there in front of them, they needed no introduction.

It was a pretty unforgettable way to end our trek. After finding the best spots to take photos and enjoy the view, we made our way back down. The descent went surprisingly quickly, and we arrived at the visitor center just in time for lunch and caught 14:00 bus to Laguna Amarga.
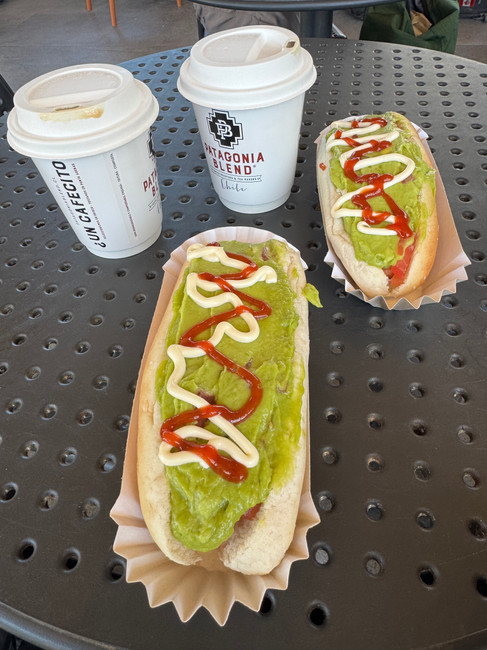
At the start of the hike, we weren't sure if we’d make it in time for the earlier bus, but everything worked out. We picked up our big backpacks from the Central & Norte campsite and even had a few minutes to celebrate with a completo at the visitor center. A Chilean-style hot dog topped with avocado. After seven days of hiking, it tasted like a feast.


Looking back, this last day felt like the perfect finish to the O circuit. Tired legs, full hearts, and a memory that’ll stick with us for a long time.
"There may be no wifi where we're going but I promise you'll find a better connection."


Top sites to visit:
O circuit
Grey Glacier (from the John Garner Pass)
Suspension bridge with view on the Grey Glacier
Los Perros Glacier
Lago Skottsberg
Mirador Francés
Cuernos del Paine
Torres del Paine
Santiago
(We shared some tips in a previous blog post)
Mercado Urbano Tobalaba
A couple's spa day at the Ritz-Carlton
Side quest in Patagonia:
Perito Morena Glacier in Argentina
How to get around:
Walk
Taxi
Uber (some people will say it's illegal but it's easy to use especially in Santiago)
Where to stay:
Santiago
Solace Hotel (123 EUR/night) - a modern high rise hotel with a great rooftop area and swimming pool. It is located in Providencia, which has good public transport connections and is walkable distance from shops and restaurants.
Puerto Natales
Hotel Vendaval (77 EUR/night) - a cozy hotel with friendly staff and where breakfast was included and they offer a welcome drink on the top floor. The one small downside was the room size. When you're packing for a big trip it is useful to have a bit of floor space to keep an overview of what you're packing. What we really appreciated about the place is that they allowed us to store our belongings (free of charge) there for the duration of our trek even though we weren't returning to the same hotel. The reason we didn't book the same hotel was because it was fully booked but it was also nice to stay somewhere else for a change.
Bungalow by Toore Patagonia (95 EUR/night) - it was the ideal place to come back to after 7 days of hiking. The room was a proper apartment, it had a kitchen area and even a bar to sit at. Although let's be honest, all you need is a hot shower at this point. It is located behind a pretty souvenir shop which means it's not looking out on the road and feels secluded and quiet. We loved the ginger cat who roams around the yard calling for attention from the guests.
For the foodies:
Breakfast/coffee
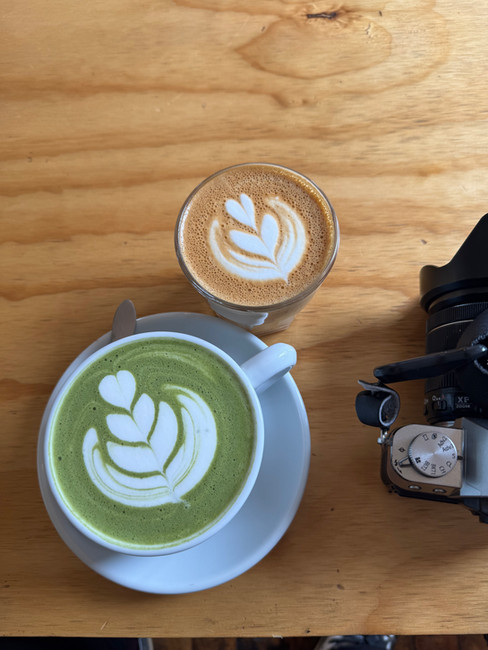
Holaste! Specialty Coffee - Puerto Natales (this place gets busy for good reason, it serves the best coffee, matcha and has great breakfast and lunch options. They even have their own roastery on site. If there are no spots inside, they also have a picnic table in their garden)
Nomad coffee - Puerto Natales (they serve good coffee but you have to try their alfajores!)
Chocolateria Patagonia Dulce - Puerto Natales (they have good coffee but would recommend going for their hot chocolate and sweet treats. If you don't feel like you've deserved it, go after you've done the O circuit or W trek)
Black Mamba - Santiago (great coffee and breakfast/lunch options, we went to this place back in 2023 and it was still good 2 years later)
3841 Coffee Roasters - Santiago (a good coffee stop, more for takeaway but they have some spots to sit inside)


Lunch/snacks
Patagonia Black Lamb - Puerto Natales (it's a bit outside of the centre but worth it, this hole-in-the wall family looking business sells empanadas, bread, sandwiches and sweets for fair prices. One of the most affordable places in Puerto Natales)
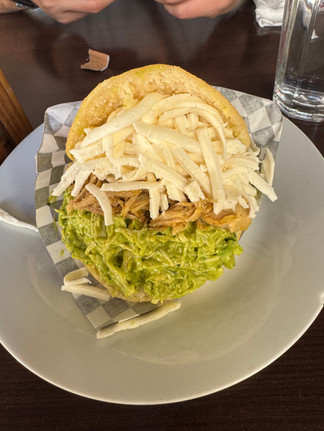
Picando Arepas - Santiago (don't let the simple fast food exterior put you off, we kept coming back to this place for their loaded Arepas. They have a lot of choices, make sure to check out their daily specials. We also loved the salsas they served with them)
Guksi - Santiago (a Korean place serving Korean style noodle soup, if you're looking for something that feels like a warm hug in your stomach this is the place to be)
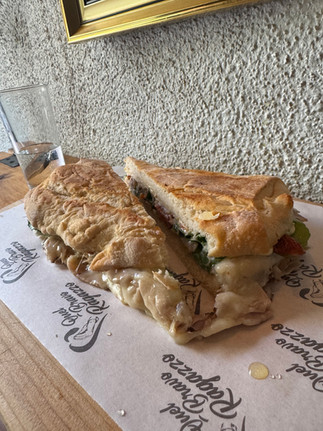
Quel Bravo Ragazzo - Santiago (yes yes, we know what you're thinking. Coming from Europe, why would we go to an Italian place for lunch? They import their products from Italy and the panini was delicious. The service was friendly and they were proud of their job, they even brought out some tasters for free. 10/10 would recommend!)


Dinner
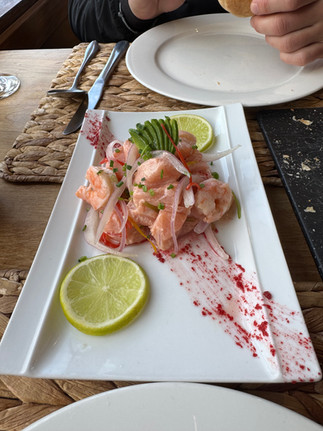
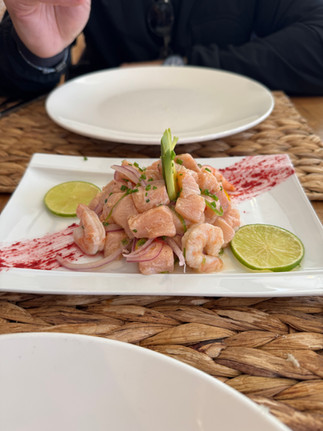
La Disqueria - Puerto Natales (easily the best meal we had in Puerto Natales. They serve their mains in big cast iron skillets called "disco" and it's a one pan meal with seafood or meat. We would recommend the Patagonian salmon & shrimps and the king crab as well as their ceviche as a starter. If. you order wine by glass, you won't be disappointed as they pour generously. They don't take reservations, and you have to stand in a queue if you want to wait for a table so come as early as you can or be prepared to wait for 20-40 mins)
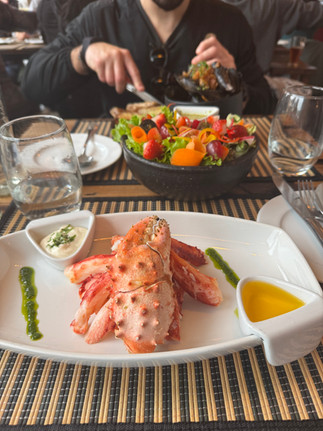
Santolla - Puerto Natales (arrive at the opening time if you don't have a reservation because they fill up quick. If you want to wait, they offer you to wait in the hotel reception next door with a drink but waiting times can be quite long. They specialise in everything king crab, so we highly recommend it. It isn't cheap but neither are you!)
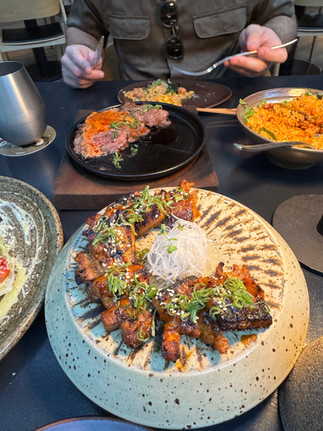
Dondoh - Santiago (we celebrated Oleg's birthday dinner here and the food was incredible. Everything from the service, to the cocktails and food were on point. Order the salmon tiradito as a starter, try the pork belly and picaña from the grill. You won't believe it but order charred lettuce, we honestly didn't know that we needed this dish in our life. Make a reservation in advance)
Mestizo - Santiago (A restaurant located in a beautiful park - Parque Bicentenario. Definitely make a reservation, when we arrived at opening time everyone was already standing in a queue to get in. We got a table inside but right on the edge of the outdoor area and the doors were folded open. It was the perfect combination of indoor and outdoor. The food was delicious but to be honest, everything was amazing after Patagonia. The shrimp ceviche and tuna steak stood out, the portions were generous)


Shops we recommend to stock up on O circuit supplies in Puerto Natales:
Outdoor shop Balfer (gas canisters)
Unimarc (supermarket to stock up on water and snacks)
Frutos Secos (for trail mix, nuts, dried fruits)

Comments